 Michael Turner
Key Takeaways
- The clearance for your Monogram refrigerator is in its installation guide; measure against that figure, not a rule of thumb.
- Keep the base ventilation grille clear, and do not push the unit flush to the wall if the guide calls for a gap.
- Level the refrigerator front to back and side to side, and check that the door gaps are even.
- The water line should run without kinks, with the shut-off valve fully open and the unit not pressing on it.
- Repeat the checks after remodeling, after moving the unit and at each quarterly condenser cleaning.
The Bottom Line
Measure the gaps, level the unit and check the water line against the installation guide, and repeat the checks when the kitchen changes. If the symptoms continue, book a diagnosis; the price is confirmed on site with a written estimate before work begins.
A built-in refrigerator lives in a tight space on purpose. The cabinetry is built around it, the panels line up with the doors and the gaps are small, which is exactly why installation measurements matter: the same tightness that makes it look built-in can starve the condenser of air, put the door out of line or press on the water line behind it. Most installation problems show up not on the first day but months later, as a compressor that runs all the time, a door that sticks or a damp patch at the back. This guide covers the measurements and checks that matter for a Monogram refrigerator, and how to repeat them when the kitchen changes.
| What to check | Why it matters | Where the figure comes from |
|---|---|---|
| Clearance at the sides, top and rear | Lets the condenser shed heat | The installation guide for your model |
| The base ventilation grille | Moves air across the condenser | Keep it clear of mats and stored items |
| Level and door alignment | Doors seal and swing correctly | A level on top and a look at the door gaps |
| Water supply line and valve | Feeds the ice maker and dispenser | Shut-off valve open, line free of kinks |
| Power supply | Steady power for the compressor and controls | The installation guide and a qualified electrician |
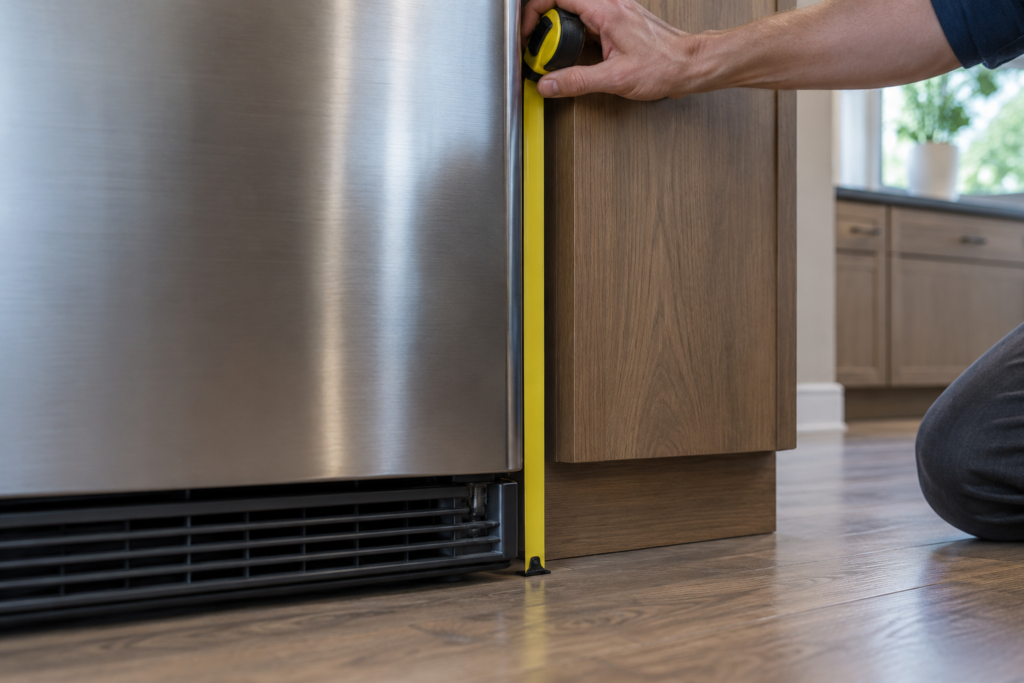
What Is the Monogram Refrigerator Installation Clearance?
The figure is in the installation guide for your model, and it is the one to follow. The compressor clearance notice on this site says exactly that: consult the installation guide for the clearance on your model, make sure cabinet cutouts and enclosures give the airflow opening it specifies, and keep the ventilation grille at the base unobstructed. The notice gives typical minimums, but the pages of this site do not agree on a single number for every model, so measure against your own guide rather than a rule of thumb.
Insufficient clearance does not announce itself. The notice lists the signs of poor compressor ventilation: a warm side or rear panel, a compressor that runs without cycling off, interior temperatures above the set point, higher energy use and a louder hum or vibration.
How Do You Measure the Gaps Correctly?
With a tape measure, at several points, with the doors closed and the unit pushed to its installed position. A single reading at the top of a gap tells you little, because cabinetry is not always square and a refrigerator can sit at a slight angle.
- Measure at the top, middle and bottom of each side. A gap that narrows is a sign of a tilted or shifted unit.
- Measure the rear space if the model has a rear condenser. Do not push the unit flush to the wall when the guide calls for a gap.
- Look above the unit. A panel or soffit added later can close the top gap.
- Write the figures down. They are useful when a technician asks about the installation.
How Do You Know the Refrigerator Is Level?
With a bubble level on top and on a shelf, front to back and side to side. A refrigerator that leans forward closes its doors by itself, which is useful, and one that leans the wrong way leaves them open a fraction, which lets warm air in and creates moisture along the edges. The doors are the best check of all: the gaps between a pair of doors should be even, and a door that drifts open on its own needs a second look.
- Adjust the feet or rollers as the installation guide describes. Small turns, then recheck.
- Check the door gap after leveling. It should be even from top to bottom.
- Try the paper test on the gasket. A door that is true grips the paper evenly.
What About the Water and Power Connections?
They are part of the installation too, and the ones most often disturbed when a unit is moved. The water line should run in a gentle loop with no kinks, the shut-off valve should be fully open and the unit should not press on the line when pushed back. The ice maker water pressure notice explains how to check the household pressure with an inexpensive gauge and says that the supply must fall within the range the ice maker is designed for.
On the power side, a built-in refrigerator expects steady supply on its own circuit, and our guide to Monogram appliance dedicated circuits covers what that means. Any electrical change belongs to a qualified electrician, not to the owner.
Common Installation Mistakes
A handful of mistakes account for most of the trouble, and all of them are easy to spot once you know what to look for. They tend to come from the installation being done to fit the cabinet rather than the guide.
- Boxing the unit in. A panel across the top or a filler strip over the grille cuts off the airflow the condenser needs.
- Pushing it hard against the wall. It can flatten the water line and block the rear air path.
- Leaving it out of level. The doors then sit unevenly and the gaskets do not seal along the whole edge.
- Using the shut-off valve as a pressure regulator. A partly closed valve starves the ice maker and mimics a low-pressure fault.
- Storing things in front of the grille. Mats, baskets and cleaning supplies are the usual culprits.
None of these needs a technician to fix. Most need a helper to slide the unit forward, which is worth doing while the condenser area is open for its quarterly vacuuming.
Repeat the Check When the Kitchen Changes
Installation measurements go stale. A new floor can change the height, a cabinet panel can close a gap, a replacement dishwasher or range beside the refrigerator can shift the airflow, and a move of the unit for cleaning can leave it a little out of position. The checks above are quick, and the quarterly condenser cleaning in the Monogram refrigerator maintenance guide is a natural time to repeat them.
- After any remodeling. Floors, panels and neighboring appliances all change the space.
- After moving the unit. Recheck level, clearance and the water line.
- At every condenser cleaning. Look at the grille and the gaps while you are there.
When to Call for Help
When the measurements are right and the symptoms continue: a warm interior, a compressor that never rests, a leak at the line or a door that will not seal. The built-in refrigerator reliability guide lists what an owner can check, and a technician can look at the rest. A diagnostic visit for a Monogram appliance starts from $120, with the final price confirmed after diagnosis and a written estimate before any work begins.
For a new installation or a move, see our installation and setup service, or schedule a visit.